![]()
Our YouTube channel offers a video tutorial on handling and installing Climate Recovery.
This instruction guide will walk you through the handling and installation of the pre-insulated Climate Recovery Duct System (CR Duct System) and its products: Climate Recovery Ducts (CR Ducts) and Climate Recovery Fittings (CR Fittings).
Here’s a brief overview of what you’ll find:
-
- CR Inventory
- CR Preparation
- Applying the CR Sleeve
- CR Fittings and Ducts
- CR to round sheet metal
- Round to Rectangular
- Proper Hanging
Brief overview
CR Ducts are delivered flat in sealed recyclable plastic bags, measuring a length of 2350 mm.
CR Fittings are delivered packaged in recyclable cardboard boxes.
CR Duct bags and CR Fitting boxes are water repellant, but should be protected from rain and standing water. CR Ducts and CR Fittings are not damaged by humidity.
CR Duct plastic bags are not UV-resistant.
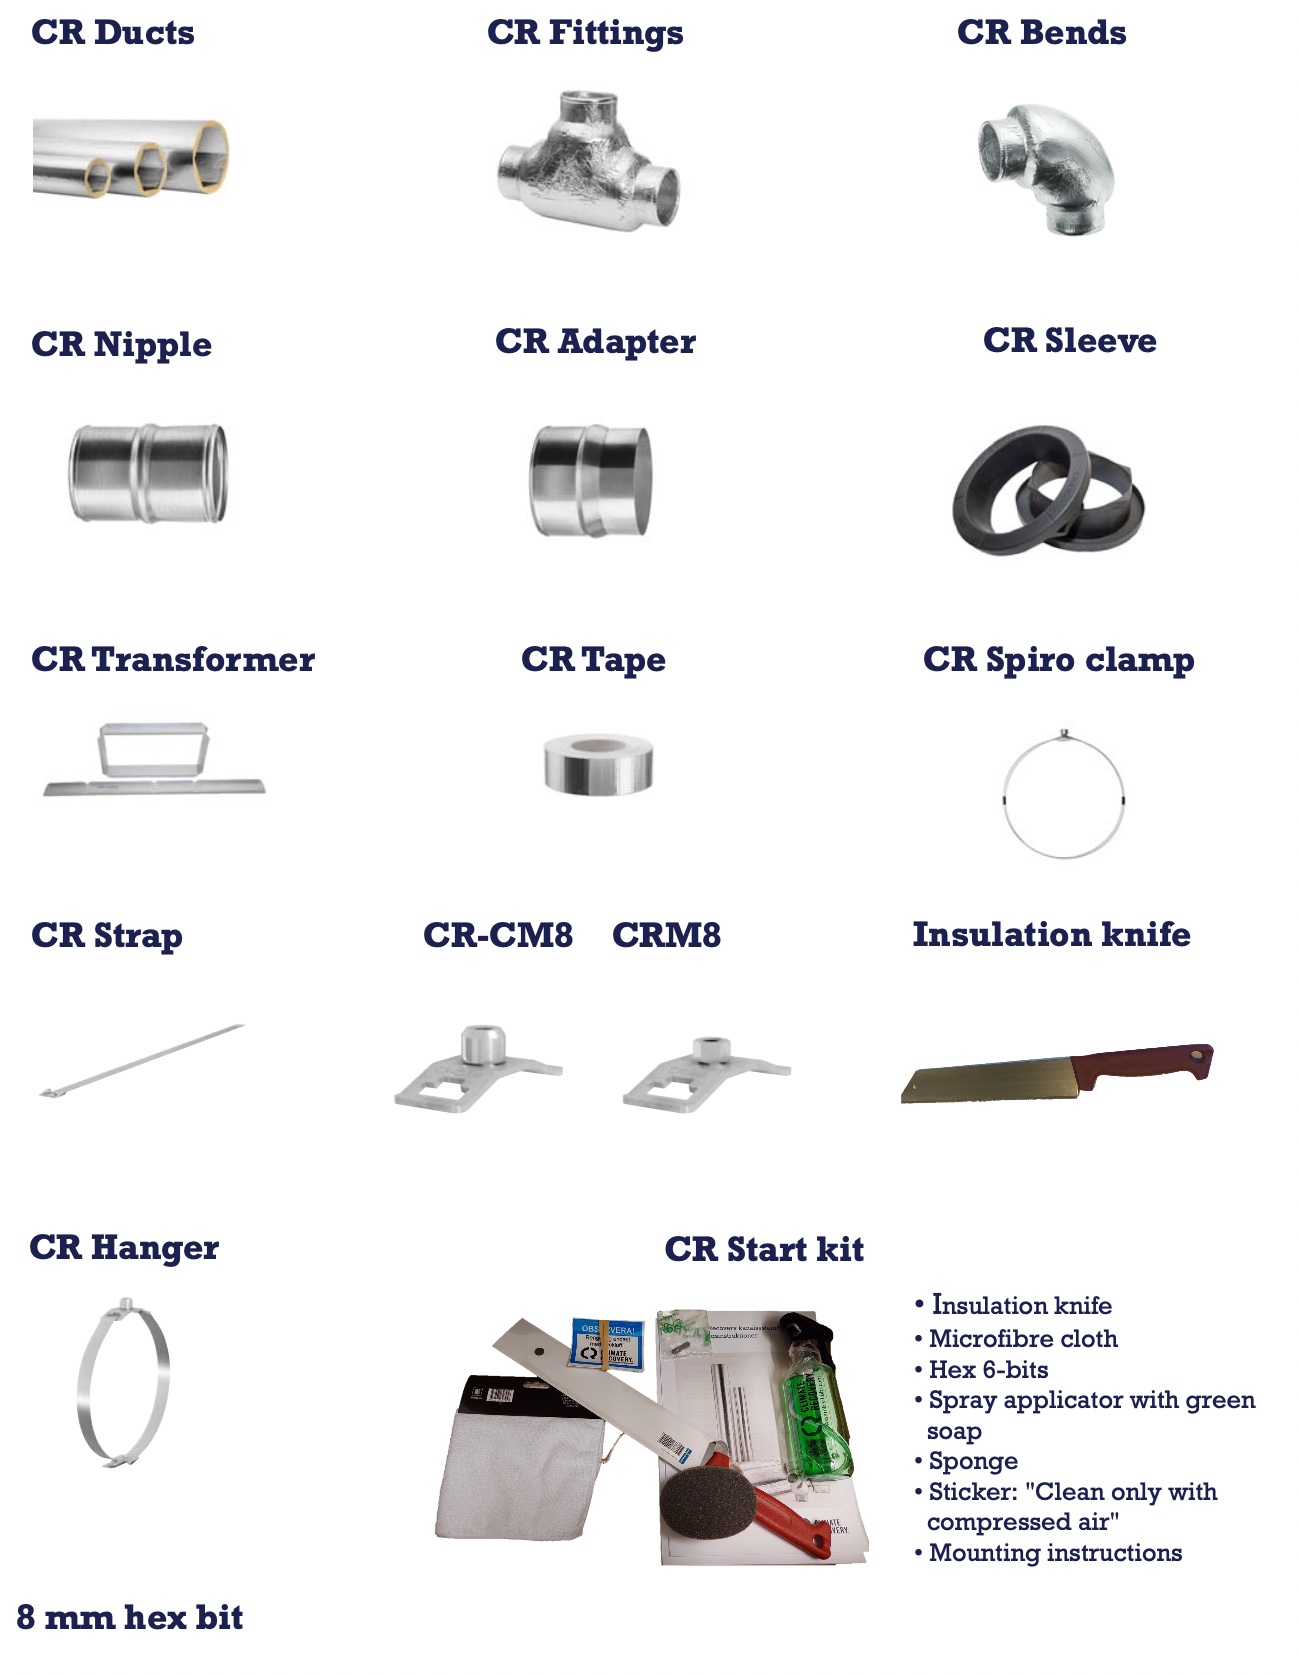
CR Inventory
CR Preparation
Each duct is individually packaged flat in a recyclable plastic bag. CR Ducts will quickly expand to their round form when the seal on the plastic duct bag is broken. When cutting into the duct bag, be careful not to damage any portion of the duct. As the plastic bag is unsealed, the interior will be open to dust and other pollutants.
CR Fitting boxes contain varying amounts of each type of fitting, dependent on size. Be sure to protect CR Fittings from external pollutants, such as water and dust, as much as possible.
If necessary, clean the duct with a micro fibre cloth before mounting!
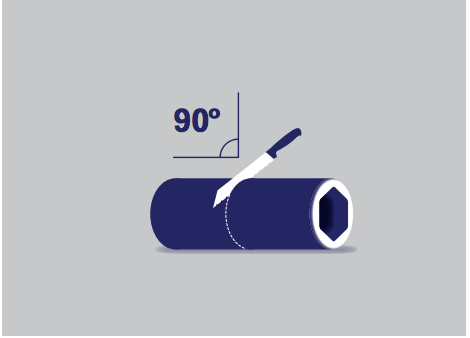 When cutting CR Ducts to fit specific installation requirements, use of an insulation knife or large utility knife provides the straightest cut possible. To begin, slice a hole in the CR Duct clear through both the outer and inner foil with the knife, thereafter cut carefully around the circumference of the duct.
Cutting should be done slowly to avoid tearing the inner foil. Avoiding angled cuts will ensure simpler mounting with the highest possible tightness levels in your system. When cutting less than 10 cm, hold the inside of the open end of the duct, as there is risk in tearing the inner or outer protective foils.
Clean the duct properly after cutting. It is important that there are no glass fiber remains left inside the duct!
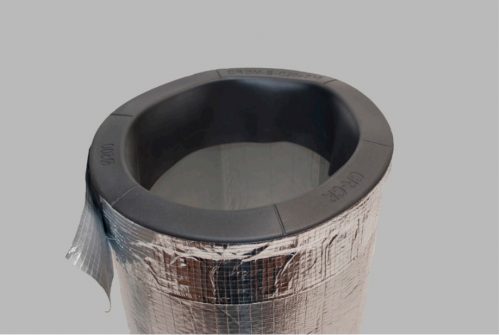
After the duct is cut to the proper measurements, a CR Sleeve must be placed on both open ends.
The CR Sleeve serves four main purposes:
-
- Protecting the internal foil of the CR Ducts from being damaged when introducing new connections.
- Preventing pre-insulation from entering internally transported air within the ventilation system.
- Preventing moisture from entering into the insulation layer of the duct.
- Creating the highest possible tightness of the system.
Each duct is individually packaged flat in a recyclable plastic bag. CR Ducts will quickly expand to their round form when the seal on the plastic duct bag is broken. When cutting into the duct bag, be careful not to damage any portion of the duct. As the plastic bag is unsealed, the interior will be open to dust and other pollutants.
CR Fitting boxes contain varying amounts of each type of fitting, dependent on size. Be sure to protect CR Fittings from external pollutants, such as water and dust, as much as possible.
DO NOT lift fittings by the neck. This will degrade the quality of the fitting and prevent tight joints within your installation.
Applying the CR Sleeve
 Step 1
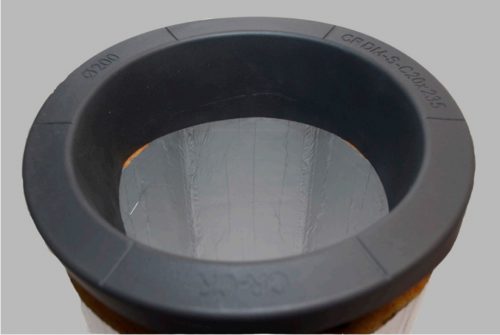
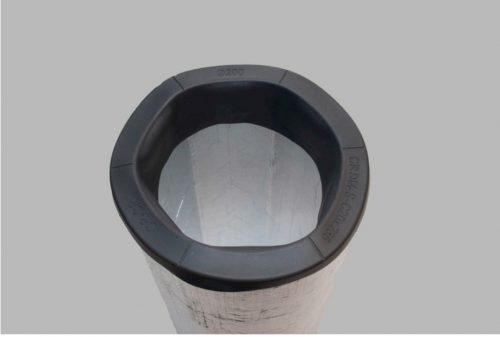
Make sure that the 6 notches on the sleeve are oriented correctly to the hexagonal form of the duct.
Step 2
Place the sleeve into the open end of the duct, with the 6 inner sections filling the hexagon and outer section covering the end of the duct.
 Step 3
Secure the position of the sleeve on the duct by wrapping tape around the joint. Make sure that the duct is clean from dust and dirt. If necessary, clean the duct with a micro fibre cloth.
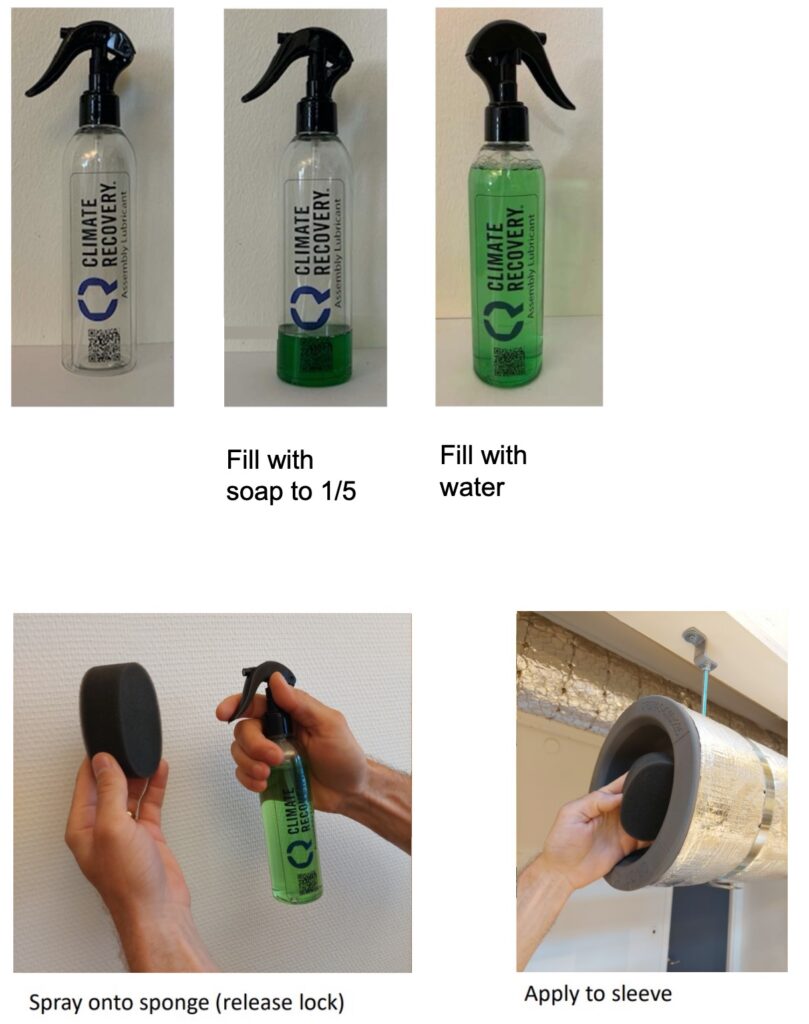
Soap Application
Spray applicator with sponge
- Soap (green soap) mixed with water 1/5
- Spray plenty of soap mixture onto sponge
- Apply to sleeve and/or fitting
Avoid using soap on the outside of the duct as this may reduce the stickiness of the tape.
CR Fittings and Ducts
Slide the duct over the CR Fitting until it completely covers the neck. The edge of the duct should come into contact with the larger, central portion of the fitting. NOTE: Always use soap on the fitting neck, making this step easier. Do not use soap on the ducts as this can make taping difficult. And don’t carry the duct by the neck!
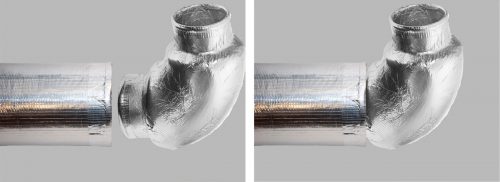
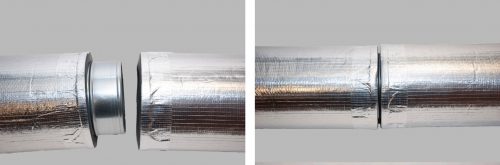
CR Duct to CR Duct
The same mounting procedures are followed when joining two CR Ducts.
CR to round sheet metal
Tightness Class C
When combining CR Products with sheet metal, prepare a CR Clamp near the end of the duct, covering the CR Sleeve. The clamp may be tightened around the duct and sheet metal to the highest possible strength, which will secure Tightness Class C. The CR tape can be used to secure the connection between the CR Fitting and Duct.
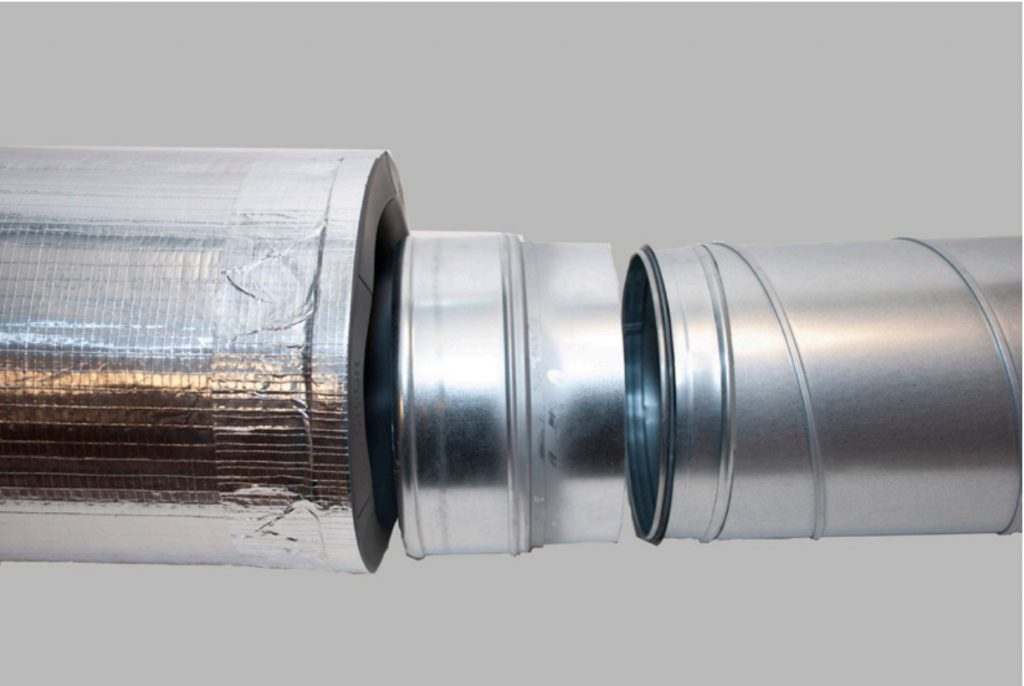
CR Ducts with standard round sheet metal applications
The connecting portion of a standard sheet metal fitting or plenum box is too short to allow for tight and secure mounting to a CR Duct. In these circumstances, it is necessary to utilize a CR Adapter, which is a simple extension to the end of the fitting. In one end, the CR Adapter fits into the CR Duct, which has been prepared through Step 3 of the previous mounting procedure. The opposite end then has the dimension of corresponding round sheet metal applications, with the use of a standard sheet metal nipple with rubber sealing for ducts. The CR Adapter is slid into the chosen connection point of the duct, fitting or plenum box.
CR Fittings with standard round duct applications
Standard dimension round nipples fits into the CR Fitting, which allows for connections between normal round sheet metal ducts and the CR Duct System.
To secure, place CR Tape around the circumference of the joint, covering the ends of both duct and fitting.
Make sure to use nipples and adapters with rubber sealing. This creates a tight seal and reduces leakage. Using nipples or adapters without rubber sealing can harm the inner foil of CR Fittings, so we advise not to use these.
Round to Rectangular
Transforming the CR Duct
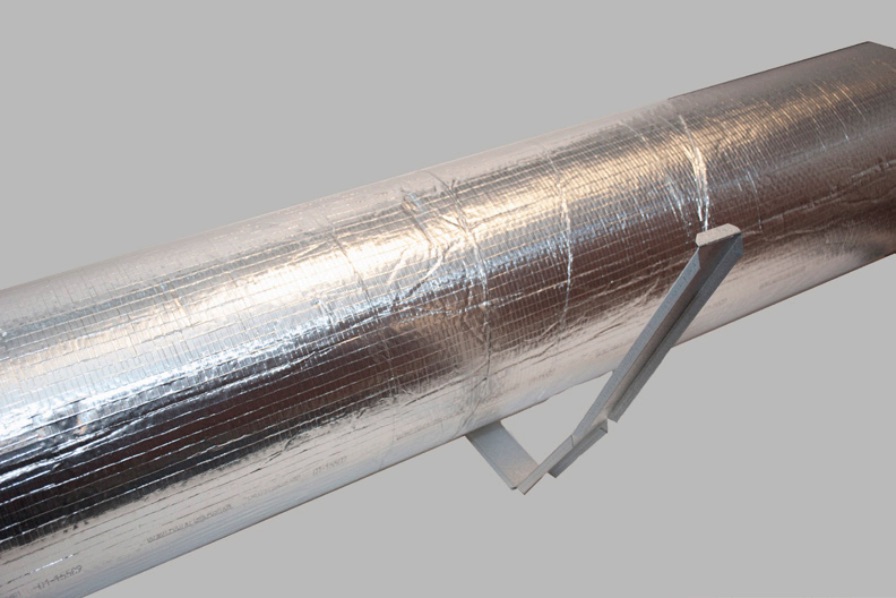
A key feature of the CR Duct is the ability to be transformed from round to rectangular at chosen locations throughout your installation. This can be done very simply with the CR Transformer.
Upon delivery of your CR Ducts, you will notice two longitudinal lines across the surface are marked with “DO NOT FOLD HERE.” When CR Ducts are manufactured, we pre-fold four of six corners in the internal hexagonal structure. This is to allow for our flat packaging and further structural integrity throughout installation and use. The CR Transformer is the only guaranteed way to form the CR Duct from round to rectangular. CR does not support any other methods.
The CR Transformer comes with raised edges to add strength to the frame. These should be placed facing outwards, with the flat side facing towards the duct. Three sections are marked by lower raised edges to form the corners of the rectangle. Transformers come with a latch and hole on opposite ends, which clasp together. Be sure not to bend the transformer multiple times as this will decrease its strength.
Step 1
Place the transformer onto the duct at the selected location of rectangular mounting, ensuring that the pre-folded corners are those creating the four corners of the rectangular duct. Bend two corners to create an initial frame.
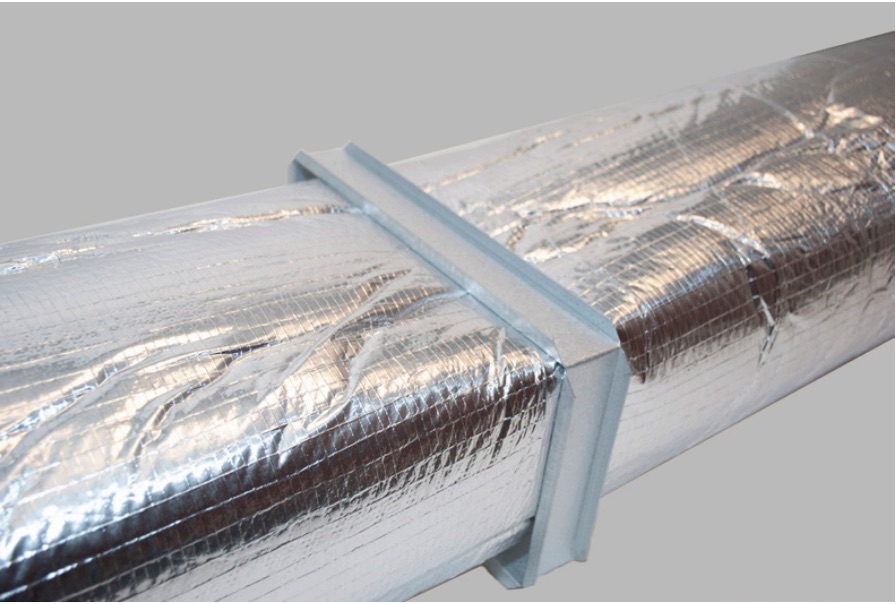
Step 2
Bend the last section around, shaping the duct into a rectangle, and secure the latch into the hole
Proper Hanging
Putting the CR Duct up
Hanging of the Climate Recovery Duct System should be done in the easiest way possible, abiding by EN 12236 and local authority standards. The CR Duct System does not transport vibrations, so CR Ducts and CR Fittings are able to touch other installations and building parts without creating more noise in your project. It is important to note that this applies as long as the parts in contact with CR products are not:
- possessing any sort of sticky substance along the exterior;
- vibrating on their own;
- reaching a temperature above 60° C.
We recommend that as much as possible of the combining of the ducts is done on a workbench (or the floor). Due to the low weight of the ducts it is usually a lot easier to mount a complete section. Not to mention the reduced bodily effort. Also, we have found it easier to mount a CR Duct on a stable CR Fitting than vice versa.
The CR Duct can be folded at various angles to create easier mounting scenarios and applications, while maintaining its patented memory to spring back to the standard round shape.
Avoid repeated folding of the ducts as over time rigidity can be diminished, sacrificing the beneficial qualities and aesthetic appeal of CR Ducts.
Mount alone, but follow the rules
The low weight of the CR Duct System allows for simple hanging, but it is important to get acceptance of the inspector for the chosen method. If you are a single person mounting the CR Duct System, it is important that at least one fixed point exists along a straight installation. This will prevent difficulties in joining ducts and fittings together.
Attachment to the structure
This should be done in accordance with building specifications per standard EN 12236 protocols. When mounting the CR Duct System to the fixed building structure, M8 steel threaded rod should be used. CR-CM8 has a click function that allow attachment by directly pressing M8 rods into the fixture. CRM8 must be screwed onto the fixture.
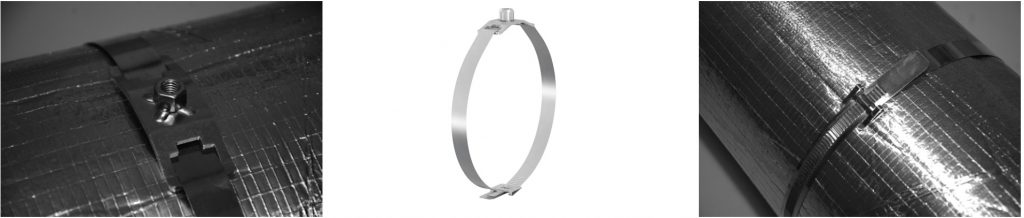
Hanging support
CR Straps should be drawn through the openings of CR-CM8 or CRM8 fixtures. The flat end of the strap is then wrapped around the exterior of the CR Duct, then through the fixed end and secured by the ridged bindings. Leaving a loose binding before hanging will allow easier adjustments made to the placement of M8 fixtures along the duct surface.
Make sure that the loose end of the CR Strap points downwards as this simplifies the tightening after final adjustment.
Hanger spacing
Hanging support of the CR Duct System should be maintained at a minimum of every 2.3 meters of duct length and within 10 cm of any joint.
If CR products are installed vertically, the support must be placed a minimum of 50 cm from joint connections, with further support spaced at a minimum of every 2.5 meters.
When combining the CR Duct System with sheet metal ductwork, support should be placed within 10 cm of joints and every 2 meters.
Any Questions? Don’t hesitate to get in touch with us!